Showing posts with label tutorial. Show all posts

Saturday, 7 May 2011

For Tea Lovers

OK, I'm a Coffee Person really but Scary and Weird God-Daughter love their tea and quite often try some of the fruit ones.  I saw a lovely idea on Pinterest a while ago and saved the link.  Well, by the time I got to actually doing it, something had gone wrong with the link so I made up my own version of a 'tea wreath'.


In the meantime, I have found it again and it can be found here on Kojo Designs, which at first sight seems to contain some brilliant inspiration and links.  Just on the first page, I think I have found three things that I want to have a go at!

So I hope that I have made it clear that this is really just my 'take' on Kojo Designs' fabulous idea.  I have done a couple of things slightly differently, simply because I couldn't find their tutorial when I was doing it, making use of the things that I had to hand and using my own ideas.

It all started with a pizza!  Surely that silly plastic base is useful for something, I thought; so I washed it and tucked it away for further cogitation.  It seemed to me that it was about the right size for the wreath so I used that instead of cutting out cardboard.


I also used some spotty paper, plastic pegs, bit of ribbon, glue and of course, the tea bags.
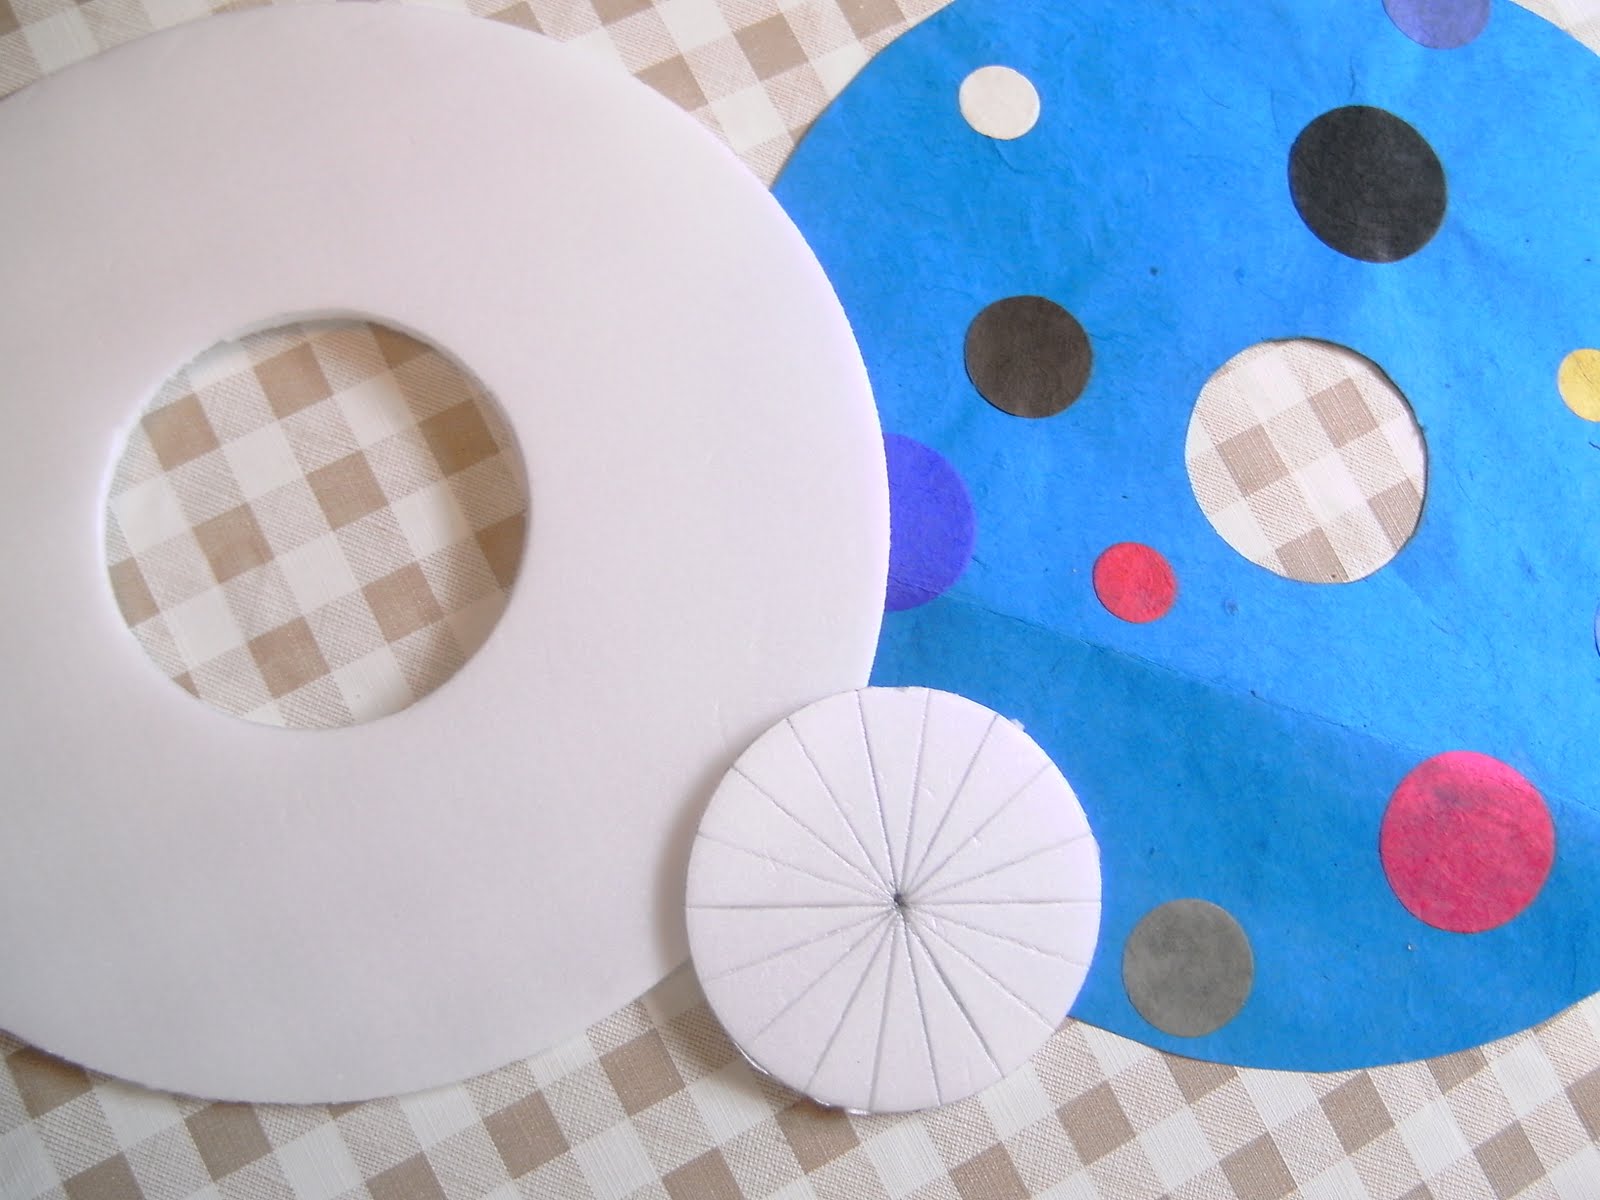


I cut out the centre of the pizza base thingy, making the diameter of the doughnut roughly the same as the length of the pegs (does that make sense?).  The small circle I marked into 18 (because I was using 18 pegs) which means a line every 20° - easy enough to mark out as long as one of your children hasn't stolen your protractor!  Hmmm.  I used this later.  The marked circle, that is, not the protractor.  (I wasted half an hour looking for said protractor.)  I also cut out the paper, making it approximately 1cm larger than the doughnut.


Using a glue stick I stuck the paper to the pizza plastic,


overlapping and snipping it on the back.


Adding to the original design, I decided to put a little teapot in the centre.  I found a picture of a pretty teapot
on the internet and, with some swearing, managed to print it out along with a mirror image and then stuck them together with a small length of invisible thread between them.  They were a bit of a pain to cut out but in the end I found a craft knife that was vaguely sharp.  I glued the other end of the invisible thread to the back of the doughnut, along with the two ends of the ribbon to be used for hanging it.

Then I cut out another ring which was exactly the same size as the doughnut (we are talking ring doughnut here, by the way, not cream ones!) and used it to sandwich the ribbon and thread, and cover the back of the wreath.


Now I used the middle bit with the lines on to position the pegs.  I think, on reflection, that the pegs fitted quite well and I could have judged it by eye but I didn't know that in the beginning and it certainly helped me with lining up the angle of the pegs.


I did use a glue gun (for the first time ever) to stick the pegs onto the paper.

Ta-da!  One birthday present for Weird God-Daughter made!

I think it would probably look really nice with more colourful tea packaging but I had to go with the finest Tesco could offer.


Phew, can I go to bed now?

Wednesday, 31 March 2010

Scarf #2


Yay!  Managed to finish the fluffy scarf!

I managed to mostly rip out the yarn from the previous attempt, with one little lump at the end that I couldn't unravel.  I looked for some help on the Internet and it told me that I should be using it double.  No way was I going to rewind that blessed stuff into two balls (I was beginning to be sick of the sight of it) so I decided to mix it with something else.  I had some undefined black wool (4 ply I think) so I had a go with that.

It worked really well and although not easy to knit, it was certainly 100 times easier with the 4 ply.

I'm afraid the pictures do not do the yarn justice.  In the turquoise there are also patches of purple, sea green and grey and it is so soft and not at all itchy.

Anyway, I couldn't find a pattern online that I liked, and I didn't just want to do garter stitch as I thought that would take too long, so I just made it up.  (Well, actually I started following a simple lace stitch in one of my books but I was watching True Blood at the time and forgot to do row 3 of the pattern!)

I had one skein of Colinette SilkyChic in colour Jay.
One ball (approx 100g but I only used maybe just over half) black 4 ply.

Cast on 24 stitches loosely on 10mm needles, with both yarns.

Knit one row.

Row 1:  K.1, (yrn, K.2 tog) repeat instructions in brackets until last stitch, K.1.
Row 2:  Purl.

Repeat these two rows until desired length; I did about 60 inches and then knit another row at the end.

Cast off loosely.

Please remind me not to buy fluffy wool again!

Saturday, 6 February 2010

Valentine Garland

This all started when I received the latest newsletter from Kids Craft Weekly and they had some 'kiss cards' for Valentine's Day. They have some really good ideas, albeit sometimes for younger children.

I do love garlands. I look at the ones on flickr and make plans but never seem to get to it. It's all a bit superfluous I guess. Real Life gets in the way. That and the fact that our walls are harder than diamonds and putting them up requires industrial equipment and a very well bribed Marathon Runner!
So anyway, I digress ....

First find some red lipstick (you might have some in your handbag but I got mine from Boots, £1.99, as red isn't normally my colour) and get some willing (or bribed) volunteers:


Then proceed to snog some paper. I bought a big sheet of thick white paper from the stationers for 50p.


I decided to use some heart shaped biscuit cutters rather than circles; I had three sizes and did a selection.

Then Mad Child and I cut them out, being careful not to smudge the lipstick.


Then I laminated them. I managed to get quite a few into each laminating pouch, leaving spaces between but they were rather tricky to feed into the machine as they kept slipping about.


Unfortunately on the last sheet, the pouch went into the laminator but didn't come out. Oh joy!

So maybe we'll have some lunch. A little bit of leftover steak and ale pie, that will do. Calm the nerves.


Then, whilst teaching Mad Child a bit of Anglo Saxon, I took the laminator to pieces, unravelled the last sheet and put it all back together. If you want to make one of these garlands, you may not need to do this step!


Then we proceeded to cut them out again, this time with a border of laminate around the edge.


Now we had 20 hearts of various sizes.


The next step is to string them into a garland. But which ribbon to use?

Most votes seem to have been cast for the red rickrack.
By this time Marathon Runner is home from work and 'helping'! We wanted ours approximately 180cm long and we just randomly placed the different sized hearts roughly 5cm apart, leaving ends on the rickrack for pinning. It turned out that we only needed 12 of the hearts but I am sure the others will be used for something.

We started off gluing the rickrack onto the back of the hearts but it didn't stick quickly enough (we were in a hurry to finish at this point) so stuck a bit of sellotape on as well.

Yay, tis done!!!!!!!!!

Obviously, by this time it is dark!!!!!
Hope you like it!